|
|
|
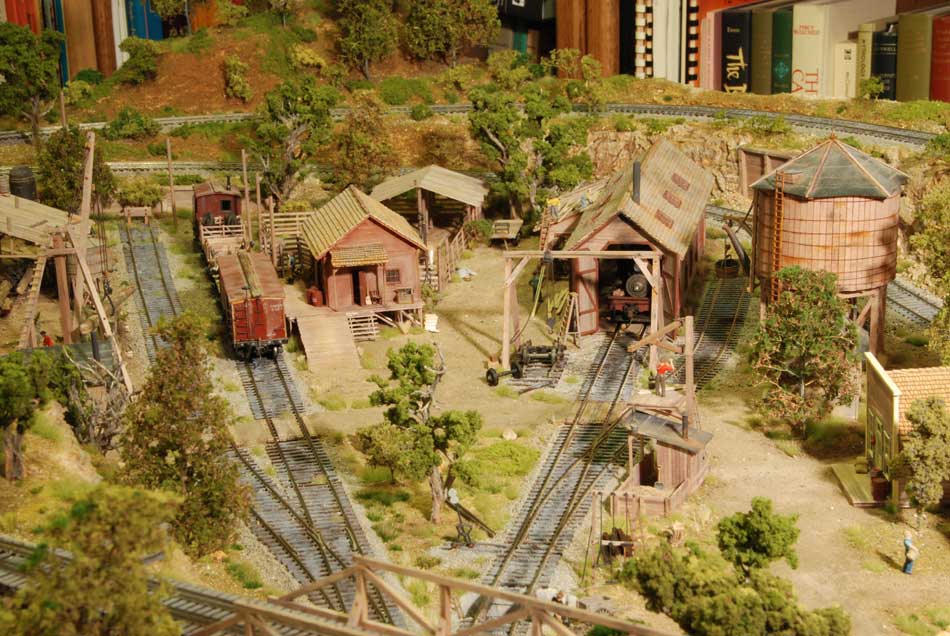
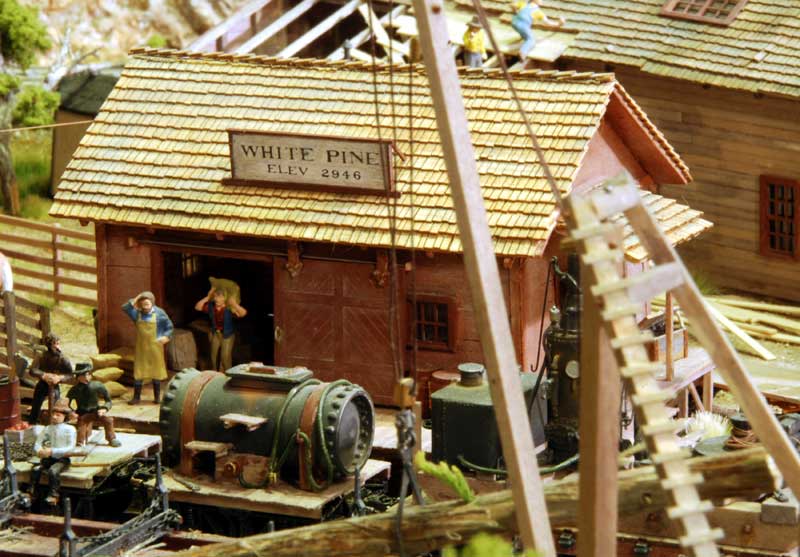
The "Hub"
of White Pine - lumber
mill, freight house, horse coral, |
Little Logging Railroad
Structures
and Buildings
(click to view series of images).
|
|
|
The "Hub"
of White Pine - lumber
mill, freight house, horse coral, |
|
|
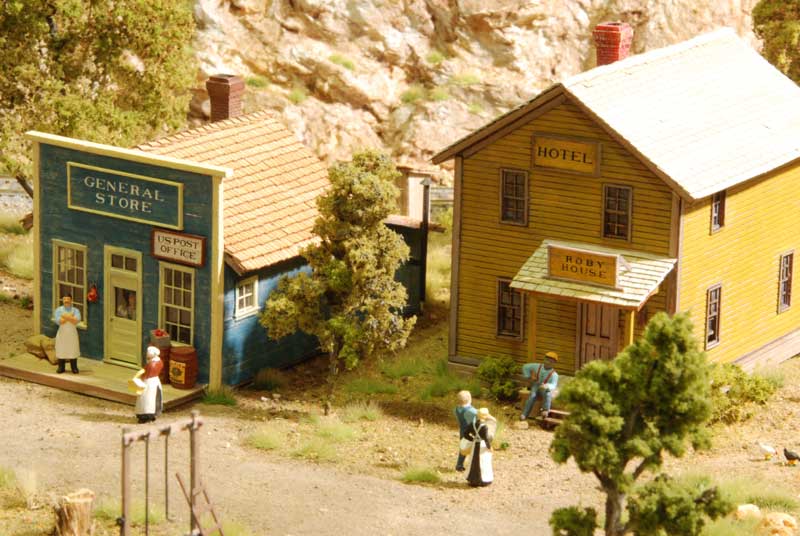
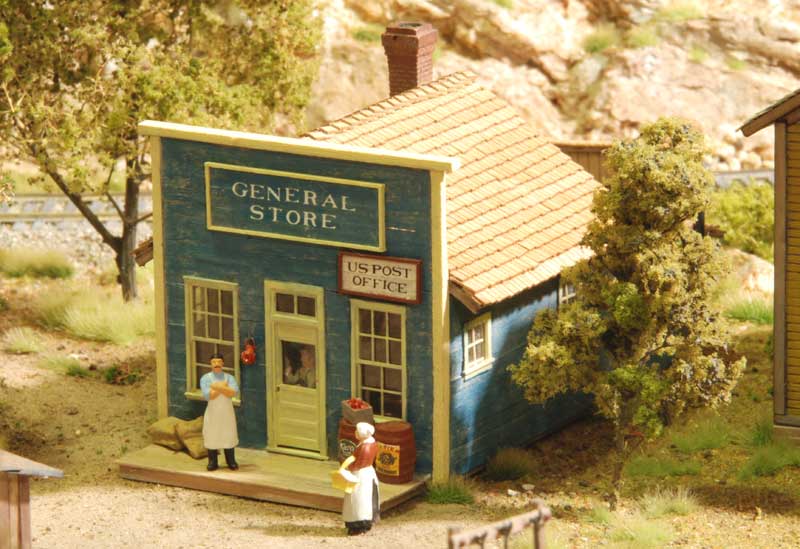
The Company General Store, with the shopkeeper looking for a customer or two. |
Most but not all the structures and buildings were scratch-built with basswood, designed and based upon images I saw in books and magazines, and over the Internet. These include the single-stall engine house, pump house, coal, sand and ash pit facilities, company mercantile store, freight house, corral, chicken coop, tool shed, saw mill facility, sawdust burner, and a mountain station and store. I also used wooden kits, including the "company house," a Branchline Laser Art kit; the water tower and bunkhouses, modifications of John Randall kits; and the saw mill derrick, from Suncoast Models. The five outhouses located throughout the diorama were also from a laser cut kit offered by Banta Modelworks. Oh, to have such conveniences all the way out there in the woods!
Having focused on horse teams to move and haul the cut logs, I researched and built what was called a "Perry Log Cart." I also elected not to use the typical "wigwam sawdust burner" style as that configuration seems to be a post-WWI invention. Having seen a photo of cylindrical sawdust burned of my era, I used the boiler section from an old brass steam locomotive to form the structure of this sawdust burner.
While I first put in the "high star" switch stands (a style still in use today), I later replaced them with "harp" switch stands, more in keeping with the turn-of-century era. I understand that harp stands were more typically associated with "stub" switch turnouts, which where no longer being constructed after 1899, in favor of the "split" switch turnouts we see today. But in the keeping with freelance spirit of my diorama, I just like the look of the harps and particularly their movement on my "split" switch turnouts . The switch stands come as a two-piece kit from Jaks Industry Scale Structures Limited. It took a little drilling and cutting into the soft metal of the stands and a lot of patience, but I was able to create switches with their throw shaft connected with a prepared bent wire to the turnouts that noticeably move as the turnouts move.
From a Rio Grande Models kit I've built a Dolbeer Steam Donkey, a classic feature of any logging railroad of this era. All the kits of the Rio Grande Models are so nicely detailed and realistic looking. I think they offer a great product, and fun to assemble.
|
|
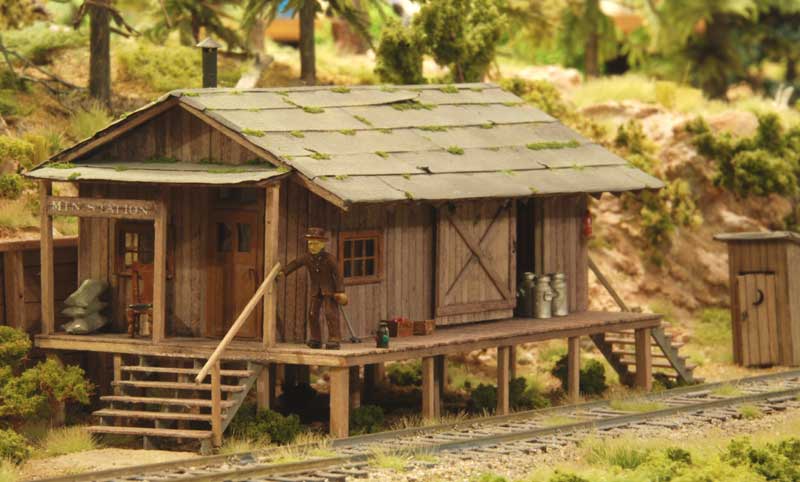
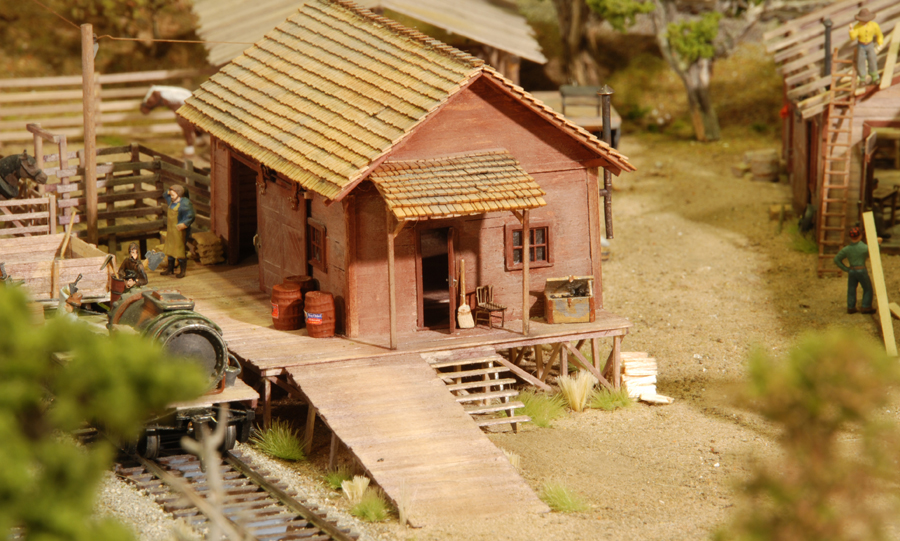
Freight station, with a "paint job" of Bragdon red powder |
Construction Process: Generally, I start with two of the squared wall frames of the structure I intend to build, then add the wall boards, and spacing for the windows and doors. Typically I've used CA glue (Cyanoacrylate) to secure my wall frame, as it sets fast, and then use white glue for the wall boards, thus firming up the structural integrity of the building. I try to be precise in cutting the 4x6 "studs" for the frame to the exact same length and use a square to corner the frame, as it is essential. I've used Midwest Products Micro-cut Scale Lumber as well as Kappler Mill and Lumber Co. basswood for all my construction. There is nothing like real wood. I typically weathered the wood before building the structures, as there is nothing uglier than to try to weather over a "glue spot." On the floor-board base, I attach the two parallel walls and then frame connecting the two walls, followed by the wall boards on those two walls. For the window "glass panes," I've used Evergreen Scale Models .005" thick sheet styrene, cutting it to the inside frame of the window and with a needle, place a small amount of CA to the top and bottom of the frame. Too much glue so easily smears the pane. For the roofing, I have used a variety of types, either black paper strips, weathered with Bragdon gray, for tar paper, or Builders in Scale Truewood Rustic Shingles or their faded gray Tar Paper. The shingles and tar paper can be nicely weathered for differing aged effects.
Most of the structures are weathered with a water and Indian Ink wash, while window and door frames are painted. I did play with some Bragdon red powder on the walls of the fright house. For the company house and mercantile store, I used a dry-brush-over-stained-wood technique. Before the dry-brushing, I did do a little ageing and weathering of the boards by rubbing the edge of a small file along some of the boards to create a grainy-look. I completed the weathering with a dosing of Bragdon gray, rubbing it in evenly over the paint with a brush. See mercantile store.
I generally don't outfit the interior of the buildings, with the exception of parts of the engine house, the entrance area of the freight house, and the company store. In the case of the engine house, I left part of the roof off, under repair you know, thus exposing what might be seen in the shop section of the facility. I built and added to this area a workbench, with tools placed upon it; a large wise and anvil; a table and set of chairs for the crew to play cards on; and a potbelly stove, coal bin, and ash bucket and scoop. And in the company store, with a shopkeeper looking out the main door, I built and placed a table and set of chairs, neatly stacked boxes and crates, and a merchant's counter. Neat stuff and fun to see through the store's windows. Unfortunately, given where the store is placed on the diorama, in the middle, one can't see inside to marvel at this detail. I haven't continued the tradition of outfitting the interiors of my buildings, unless I anticipate the roof blowing off!
Mountain Station and Store
The mountain station and store was the
last building constructed (made over a weekend in February
2009, with some additions in March). I liked the way the Builders in Scale faded gray tar paper turned
out, also adding some torn edges and Bragdon weathering powder as a finishing
touch. On the roof I added a shortened smokejack. I modified a
four-panel Grandt Line door, so I could have a couple of windows in it,
and added a door handle. The sliding door was made from 1"x 6"
boards and 2"x 6" end and cross-pieces, with hanging hinges and a
door handle added. On the porch I placed a stack of feed sacks, a
"formal dinner chair" (there's got to be a story there on how it got way up into the
mountains?),
some fruit boxes (one full, the other empty), milk cans, and on the corner wall of the building, a lantern
is placed on a small shelf (as you don't want
to stumble at night on your way to the outhouse). And on the porch I
placed a figure (acquired
during my high school days) of someone who may have had just a little too much
to drink, supported by a porch roof post. That certainly would have been
a figure acquired
during one's high school days! I later added the hand railings to the two sets
of steps, and some "moss" on the roof. With small dabs of white glue placed along some of the lower edges
of the tarpaper, I sprinkling a little of the Woodland Scenics
Fine Turf Green Grass over them. Once dry, I highlighted this green with
some brushed on light green
powder from Bragdon Enterprises Weathering System.
The resulting moss color closely matches the color of the moss on our own home's
cedar shake
roof (time to clean it off).
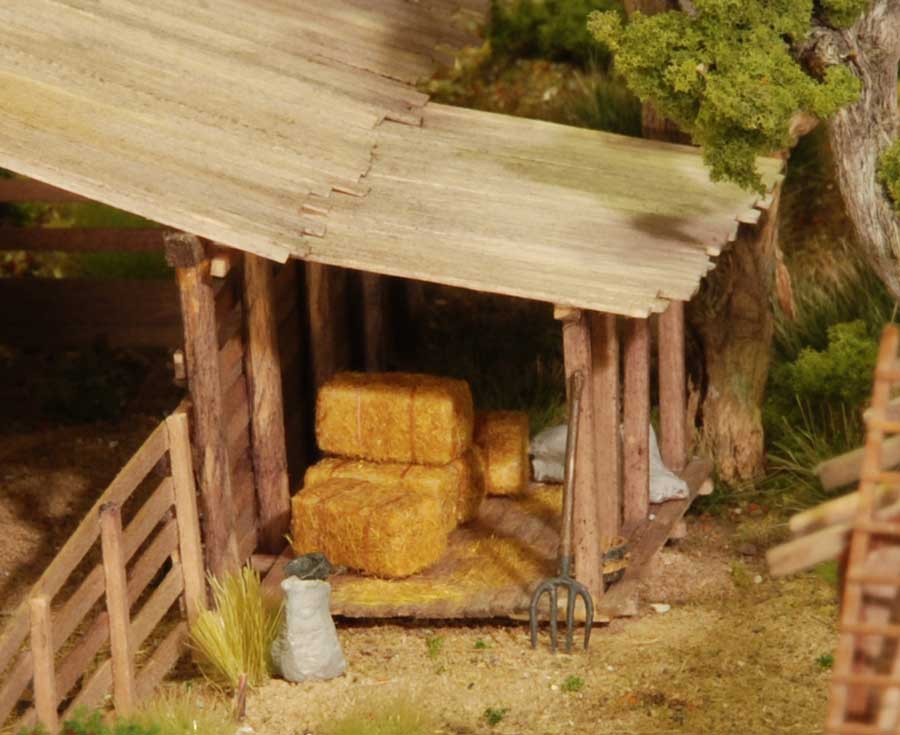
Hay
and grain shed
I've been adding a lot of little details, for
both the buildings and rolling stock, much of which is from JL Innovative Design
- Durango Press, Jaks Industry Scale Structures
Limited, Precision Scale, and Rio Grande Models. Windows, doors and bolts are all Grandt
Line products. For hose I came across someone who shared the idea of
using thin solder coils, molding it to the task at hand and painting
it. I've used these solder "hoses" at the corral water
trough, and on the water tank care and the Dolbeer Steam Donkey. For the
hay bales (in the add-on corral shed and on one of the flat cars) I used a hay
bale kit from
Busch (via Scenic Express),
with the rust-colored stretch E Z Line from Berkshire Junction as the ties for each
bale. The rust and rope E Z Lines work great as the telegraph line
connected to the freight station, as well for ropes for various little details. I made some on some of the buildings, i.e., "General Store,"
"Fright Station," "Company House" and "Mountain
Station." On this
attempt, I kept it simple, using Model Graphics Dry Transfer Decals from Woodland Scenics.
I'd first prepare the boards on which the signage would be placed, painting and/or
staining them, then gluing them together, making
sure I had excess on each side of where I'd place the lettering and not framing
it at this point. It was hard to
estimate the middle of each sign; but after the lettering, the center of the
sign could be
easily determined. Once I had rubbed on each letter, attempting to keep
them all even (not at all easy for me), I'd spray a matte finish over the sign,
further protecting the delicate lettering. Once I had trimmed the excess
from each side of the sign, centering the lettering, I'd frame the sign with painted 2"x4"
pieces. For most of the signs I weathered them
with an appropriate-colored powder from Bragdon Enterprises. In
the process of adding a little signage I discovered I needed to "name"
this little village. As white pine had grown in abundance in my part of
the country and was heavily logged, that became the name of this little logging
community, "White Pine." It's also the state tree of
Idaho. And as it is always prudent to acknowledge your key financial
backers in any logging enterprise, I named the company house with my wife's last name!
While this attempt at lettering/signage is admittedly on the crude side (I guess
the little community could not afford a professional), I believe it nevertheless adds a
level of detail and realism to the overall effect of the diorama previously
absent and not appreciated until added.