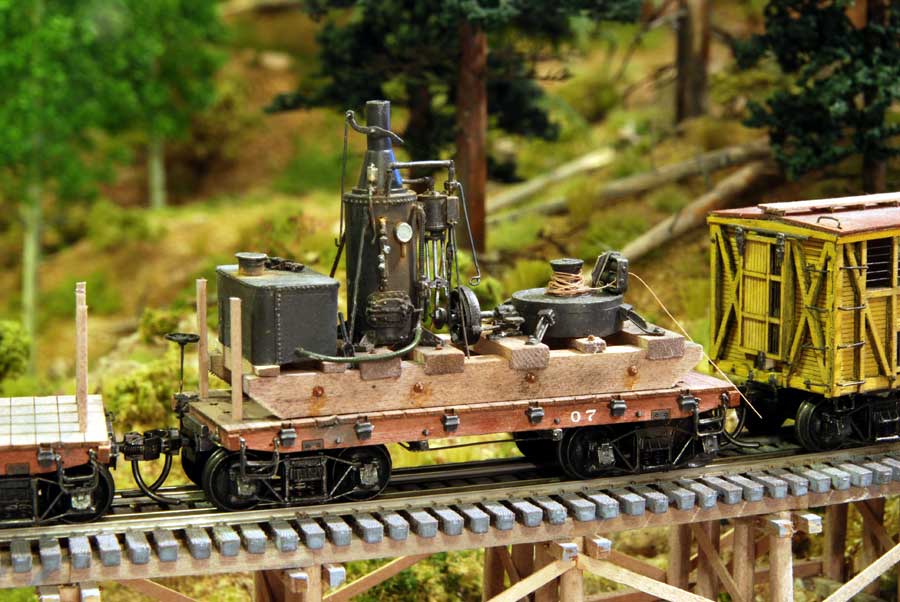
Dolbeer Steam Donkey atop a short flat car- Rio Grande Models kits
Little Logging Railroad
Tools, Maintenance, Lighting, and Photographing your Diorama
|
|
|
Dolbeer Steam Donkey atop a short flat car- Rio Grande Models kits |
Tools: It pays to have good, proper tools to do the building of the structures, scenery, and rolling stock you desire. Among those tools I've relied upon include a X-acto knife (changing blades often), single-edged razor blades (which gets a lot of use, and also has to be changed out), a Dremel power tool for cutting, drilling, sanding (with an assortment of both Dremel and Proxxon accessories), a Mascot Precision Tools pin vise drill and set of micro drill bits, small needle-nose tweezers and pliers (so essential), wire cutters, a variety of quality artist's brushes from a small 15/0 to larger, a set of needle files, an HO-scale ruler, a square for all those buildings, and, of course, good lighting and set of eyes! I used a glass pane to work on, rendering a flat, easily-cleaned surface. The glass was also a means to properly layout and space the boards of each trestle section, with its diagram beneath the glass.
Maintenance. So far not much involved with maintaining the diorama, other than cleaning the track with a rub down of denatured alcohol. I use a small cork with a fine cloth over it, soaked in the alcohol to periodically clean the rails. Its amazing how fast the track gets dirty and how sensitive the DCC locomotives are to a dirty track. After only these few months I'm also beginning to notice dust build-up on the surface of the diorama, and particularly noticeable, on the pond. The vacuum and Windex are at hand.
Dust: As I was running the layout less often and concerned about dust build-up, I fashioned a covering of removable dowels around the frame, linked by a cord and covered with a sheet of plastic. It had done the job nicely.
Tree Revival: After a year or so under a plastic sheet to keep the dust off the layout, upon removing the sheet I discovered some of the ferns had begun to wilt and lose their sharp. I remember Bragdon recommend using glycerin to maintain the sharp of the ferns. So I mixed about equal portions of glycerin with isopropyl alcohol in a small spray bottle, and sprayed the trees. I tried to go heavier on the glycerin, but my sprayer just wouldn't produce a fine mist. The next day I noticed some of the ferns had revived their sharp. But in my eagerness to try out this technique, I also notices that I had gotten some small glycerin droplets on the black roofs of some buildings, on the brown road bed, on the shinning surface of the pond, and on some sections of track. It took some manicuring, and a number of swipes with a pad soaked with denatured alcohol, but all is running fine now. Glycerin is not an easy substance to clean off. In my next tree spraying, I'll place a piece of cardboard behind each tree as it gets dosed.
|
|
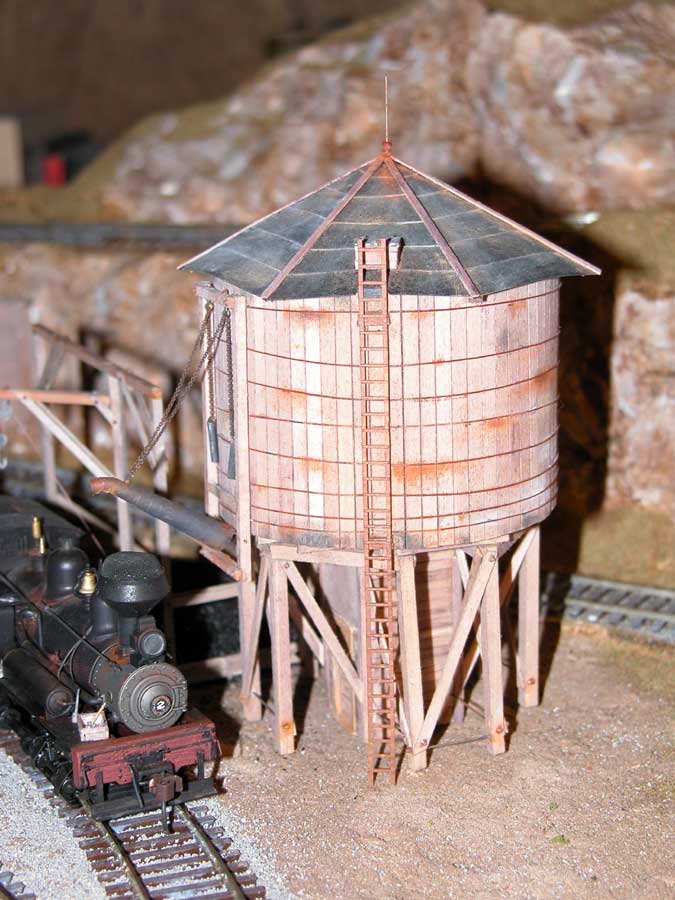
flash lighting |
Photography and Lighting. I was a little hesitant at first, but developing your skills at capturing a scene through the lens of your camera can give you a whole new perspective and access to the detail on your diorama scenes otherwise unavailable. And it can be very humbling. I am still working on developing these technique, but am starting with the following equipment and settings. The camera is a digital Nikon D80. I set it on aperture priority, and adjust it to the smallest aperture F stop (the higher numbers, such as F 16 or F 32). This increases the depth of field, bringing into focus the details in the foreground and background of the primary image. I also turned off the flash, as it is not a good source of "nature lighting," and have increased the incandescent lighting with the use of a flood light over the diorama, along with the regular ceiling lighting. You can see the results of some of my flash-assisted photos in a few of the photo sequence series, as for example in the water tower on the left. The flood light gives a nice shadow affect to the structures and scenery. I also set the camera to its incandescent lighting setting, and after securing the camera to a tripod, shot the desired image using the self-timer.
When you're attempting to capture the image of a particular scene or building, don't be afraid to move your lighting sources around, to pick-up the best possible "natural" lighting and also highlight the detail you seek to portray. Too much lighting of course washes out the scene, and not enough renders all in a shroud of darkness. The sun and clouds do move. But don't forget there is only one sun. In more than one of my photos you'll detect that there is perhaps two suns shining over this little logging railroad, with differing angles creating the shadows. And finally, I've found that the primary lighting should shine in front of or from above the primary subject of the photo, with less lighting on the background. This will highlight your subject and provide a darker background. Upon revealing what is seen through the camera's eye, its time to make adjustments to all the little details! Then, upon revealing what is seen through the camera's eye, its time to make adjustments to all the little details!