| |
CETL | Canvas | AI Guide | Course Design | Online | Software | Workshops
 Getting Started (Instructor Help) Getting Started (Instructor Help)
Login to Canvas: https://canvas.uidaho.edu
(Login Details)
Canvas offers 24/7/365 Support to INSTRUCTORS and STUDENTS. Click on Help at the bottom of the Canvas left menu to view your available options. Contact coursedesign@uidaho.edu for UofI assistance.
24/7/365 support including:
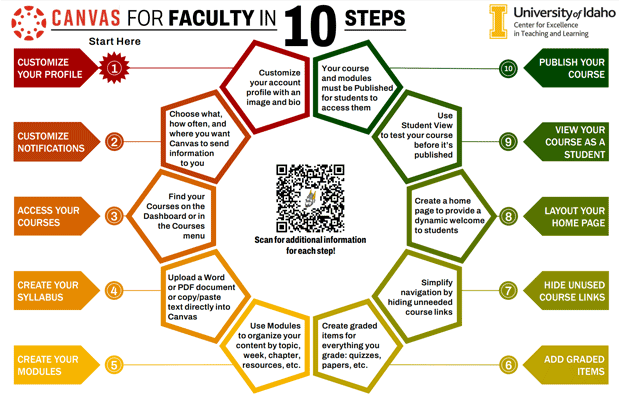
Canvas for Faculty in 10 Steps
Download Infographic Shown Above (PDF)
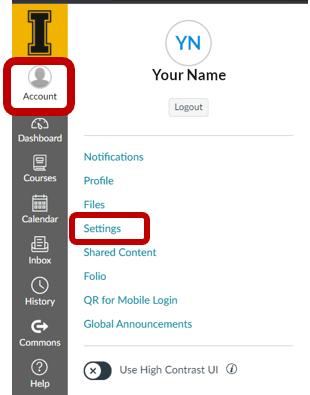
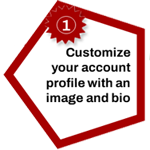 1. Customize Your Profile with Image, Bio 1. Customize Your Profile with Image, Bio
- Click on the Account link and go to the Settings link.
- Click on the silhouette to the left of your name to add a profile Image (this can be a picture of yourself or any picture that you would like to represent you).
- Click on the Edit Settings button on the right to modify your pronouns, change your preferred language, or designate your preferred time zone.
- Click on Update Settings to save your changes.
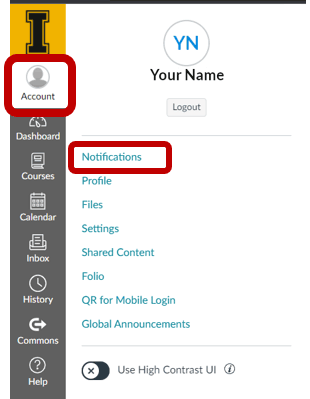
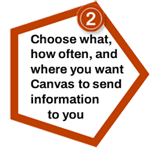 2. Customize Canvas Notifications 2. Customize Canvas Notifications
- Choose what, how often, and where you want Canvas to send information to you.
- Click on Account and go to the Notifications link. Review and customize each setting.
- Review Help with Canvas Notifications.
- Note: Recommendations for settings are available from Florida State University and from Yale.
Troubleshooting TIPs
- How to Stop Duplicate Notifications from the Canvas Student Mobile App.
- Canvas uses your preferred email account to send notifications to. If desired, contact the appropriate group listed below to switch your preferred UofI email account.
Faculty/Staff Assistance
Technology Solutions Partners (TSP)
Locate your TSP
Student Assistance
OIT Student Technology Center
help@uidaho.edu
(208) 885-HELP
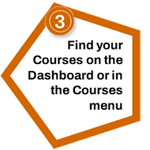 3. Access Your Courses 3. Access Your Courses
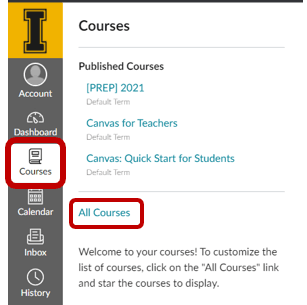
- Upon logging into http://canvas.uidaho.edu you will land on the Dashboard which will contain your favorite courses.
- Click the Courses link, then go to the All Courses link. Courses are always listed alphabetically; you cannot reorder your courses manually.
- Control which courses appear in your Dashboard by marking courses as favorites. To make a course a favorite, click the Star icon next to a course in the All Courses view. When at least one course has been identified as a favorite, the Dashboard will only display your course favorites.
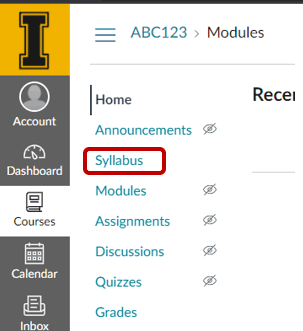
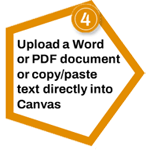 4. Create Your Syllabus 4. Create Your Syllabus
- Enter your course via the Course menu or your Dashboard and click Syllabus in the left menu bar.
- Edit your Syllabus with the Edit button at top-right of the page.
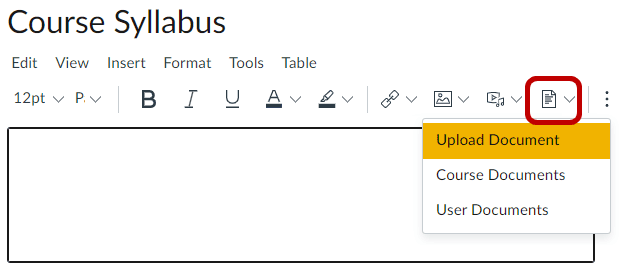
- The Syllabus Description is where you can post your course description, a brief introduction, class guidelines, weekly reminders, and other important information. You can copy content from Word documents or create original content inside of the Rich Content Editor.
- You can also link to your Syllabus by choosing Upload Document (see image) and uploading your syllabus in a PDF or Word Document.
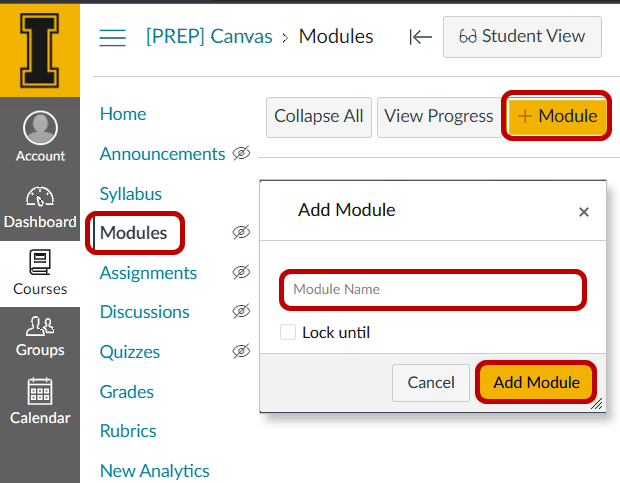
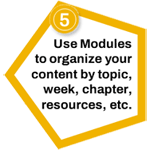 5. Create Your Modules 5. Create Your Modules
- Use Modules to organize your content by topic, week, chapter, resources, etc.
- Access Modules within the course menu at the left.
- Click on + Module at top-right for each learning unit of your course (some instructors segment their course into Chapters, Weeks, Sections, Units, etc.).
- Type in the Module Name, edit settings, check mark the box if you wish to lock the content of the module until a specific start date.
- Click on Add Module.
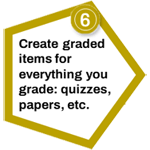 6. Add Graded Items 6. Add Graded Items
- Columns in the Canvas gradebook must be associated with a Graded Item; columns cannot be manually added directly to the gradebook.
- In your Module click the + icon to create an Assignment, Discussion, or Quiz.
- TIP: Assignment Groups can be added to categorize graded activities and to weight grades.
- Choose to add an Assignment, Discussion, or Quiz, then choose Create in the bottom box.
- Type in the Assignment Name and click Add Item.
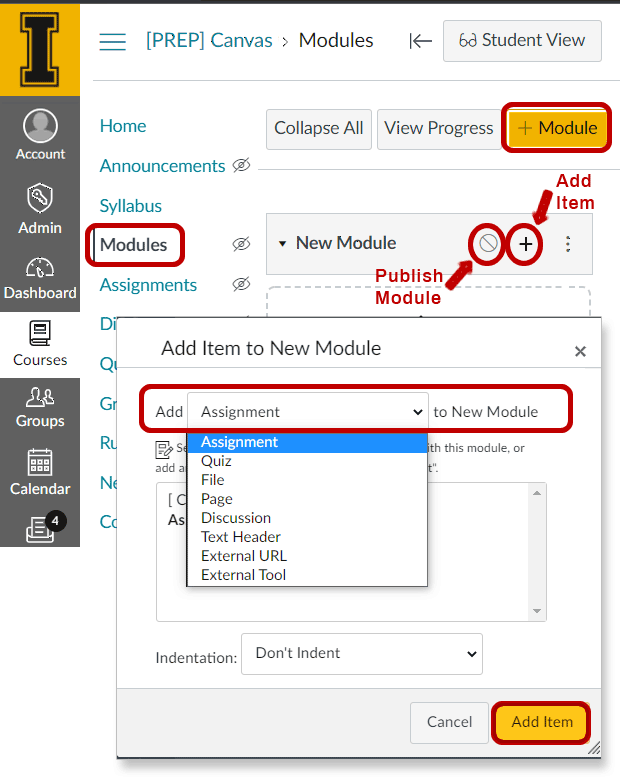
- You will now need to add content to your item. Click the new Assignment, Discussion, or Quiz you just created in the Module and click Edit at top-right.
- Here you can select a Due Date (if applicable) and provide a total points possible.
- WARNING: Extra credit assessments must always be assigned 0 points for the total points possible. This forces the gradebook to treat points awarded for these assessments as extra credit.
- Choose a Submission Type (how you want to receive the student work - online, on paper).
- Click on Save & Publish if the graded activity is ready for students to work on or Save to keep the graded activity in draft state.
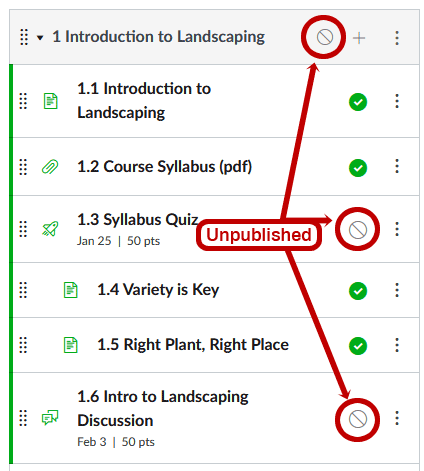
- Make sure that you Publish each Module to make all graded activities available to students. Creating a graded item adds a column in the gradebook for that assignment. Graded items cannot be directly added to the gradebook. You can also Publish and Unpublish individual items to display to and hide from students.
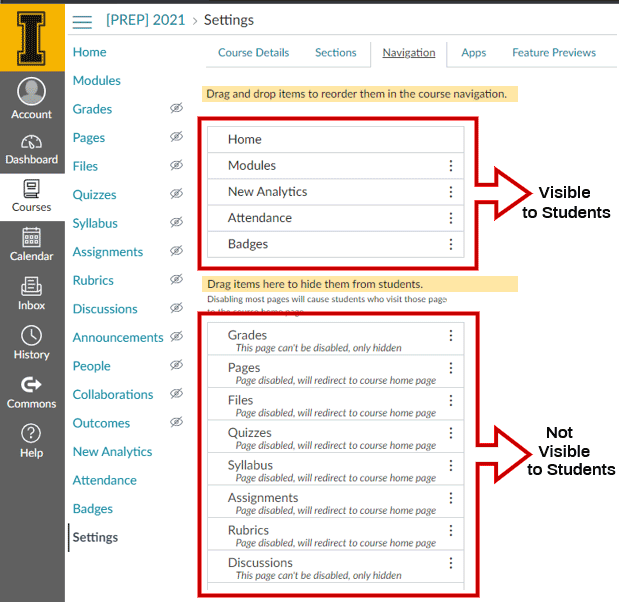
 7. Hide Unused Course Links 7. Hide Unused Course Links
- Simplify your course navigation by hiding unneeded course links.
- Click Settings within the course menu at the left.
- Select the Navigation tab at the top center.
- Drag and drop unused menu items from the top to the bottom. Hide as many navigation links as necessary to simplify the student view. Hiding a link does not disable the tool, it just hides it from the student.
- Click Save at bottom left.
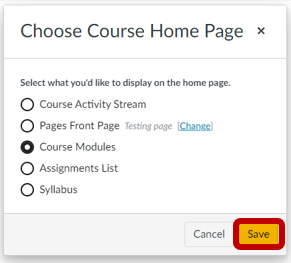
 8. Layout Your Home Page 8. Layout Your Home Page
- The Home Page is the first thing your students see each time they enter your course.
- If you wish to display a Canvas content area (such as Modules or Syllabus) as your course's Front Page, click Choose Home Page and choose the Course Home Page you'd like to display from the list of options.
- Consider providing a dynamic welcome to students by creating a personalized Welcome Page as follows:
- Access Pages within the course menu at the left.
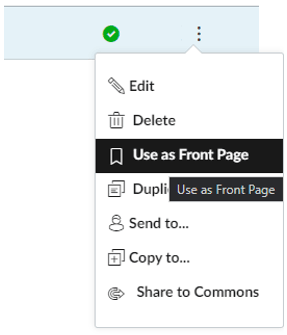
- You have a list of all the Pages you've created for your course. Once you've determined which should be the front page, click the 3 dots to the far right of the page listing and choose the Use as Front Page option.
- Click Home and your new home page should load.
- TIP: If your Home Page is not displaying, click Home and Choose Home Page from the right side. From the menu select Pages Front Page and click Save.
 9. View Your Course as a Student 9. View Your Course as a Student
- Use Student View to see your course as your students see it. This can be helpful when troubleshooting issues and verifying settings.
- The Student View button sits at the very top right of all screens viewable by students. It will display the course as seen by a student, allowing you to verify a correct presentation.
- Preview the course as a student: post and reply to discussions, submit assignments, view grades, view people, view pages, view the syllabus, view quizzes, view the calendar, and view the scheduler.
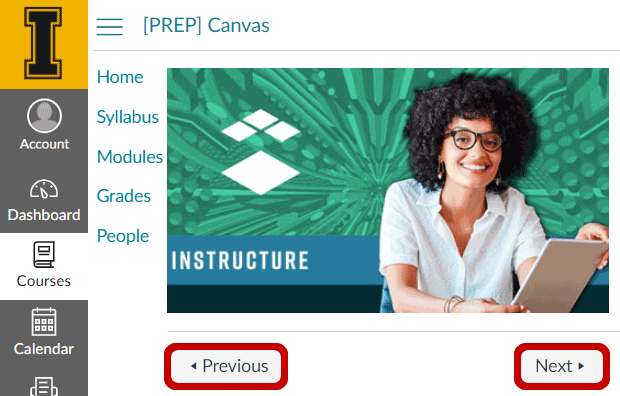
The Student View button appears at the top of the screen . . .

- Advance through the Modules using the progression bar at the bottom of a page. To advance to the next module item, click the Next button. To return to a previous module item, click the Previous button.
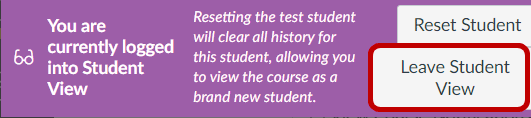
- Click on Leave Student View at the bottom right when done with the preview.
- WARNING: Attendance, conferences, conversations, collaborations, differentiated assignments, external apps, groups, peer reviews, and profiles do not work in Student View.
The Leave Student View button appears at the bottom of the screen . . .
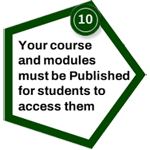 10. Publish Your Course for Student Access 10. Publish Your Course for Student Access
- Your course and modules MUST be published for students to access them.
- Access Home within the course menu at the left.
- Under Course Status at the top-right of the course, click on the Publish button. This acts as a toggle turning the course publish status on and off.
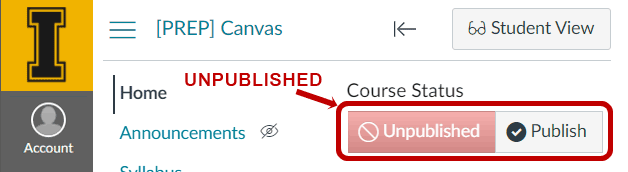
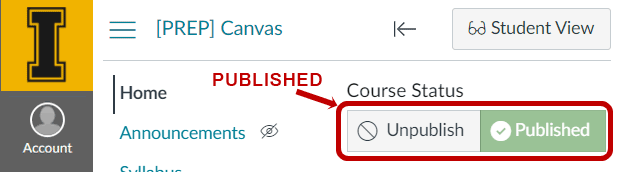
- WARNING: Publishing a course does not publish content that has been designated as draft or unpublished. To publish content, assignments, modules, etc. you must click the Publish icon next to each item.
If your course has been published and includes grades, you cannot modify the course's published status. In other words, your course can no longer be unpublished. Learn how to Restrict Student Access to a course.
|

 INSTRUCTORS