Canvas offers Tier 1 support (24/7/365 support) to instructors and students. Click on Help at the bottom of the Canvas left menu to view your available options which include live chat and phone. Contact coursedesign@uidaho.edu for UofI assistance.

 INSTRUCTORS
GETTING STARTEDCanvas SupportSTART OF TERMCourse Copy Enrollments & Courses Merge Course Request New Course RequestTEACHING TOOLSCanvas Tools (How to) 3rd-Party Tools Ally: Accessibility Inclusive Access (IA) Panopto VideoEND OF TERM"Past Enrollment" Courses Handling Incompletes Restrict Student AccessRELATEDCanvas Student Help LMS Selection ProcessPreferred Name |
CETL | Canvas | AI Guide | Course Design | Online | Software | Workshops
Managing Courses You must Publish your course to allow students to see the course listed in Canvas. To publish, go to the Course Home Page and press the Publish button. You must also publish each of the course content items (Modules, Pages, Assessments, . . . ) to give students access to each one. More info: How to Publish your Canvas Course and its Content. Verify your students are enrolled in your Canvas course by going to the People view to confirm they are listed. If the problem persists, direct your students to the CETL Student Help page that details all the reasons a student may not see a course (list near the bottom of the page): Fill out our Merge Course Request Form to ask to have multiple sections of a course combined into a single Canvas course space. Three characters, (M), are placed at the end of a Canvas course title to indicate the course is merged. Go to Settings > Sections in a merged course to view the list of sections attached to the merge. If a merge is missing a section, please email canvashelp@uidaho.edu to have it added. instructors cannot create courses in Canvas. Please fill out the Request New [PREP] or [UIDAHO] Course to have a Canvas course created for you. Requests are handled as soon as they are received. How to add an image to a Canvas Dashboard Course Card. Unsplash, a free service formerly incorporated into Canvas--which allowed you to quickly add images to a Canvas course card--is no longer available through Canvas. You may continue to access Unsplash images by searching www.unsplash.com directly. Note: This change in service does not affect Unsplash images stored in your previous courses. Yes, Canvas has course quotas. If you upload over 5 GB of files to a course, you will be prevented from uploading additional files and will instead get an error message. View your current file usage by opening Files to locate the quota percentage used at the bottom. Completed courses are courses that have been changed in status from "active" to "completed". For UofI, one year after a term is finished all courses in that term change from "active" to "completed". The one-year delay after the end of term accommodates incompletes. Once a course is "completed", it can be viewed by the students and instructors, but is no longer modifiable. Completed courses do not display by default in student's Canvas dashboards but can be viewed as needed through . Managing Enrollments CETL cannot add users to current "for-credit" classes in Canvas. These enrollments, no matter the role, must flow directly from Banner. Contact your Departmental Scheduler and ask them to request the additional user(s) be added to your Canvas "for-credit" course via the Classroom Scheduling request form. This information is pushed into Canvas at 6am, 11am, and 4pm daily. See Enrollments & Courses (Instructor Help) for more info. CDAR Notetakers are added to a Canvas course as Participants by the Center for Disability Access and Resources (CDAR). Although these individuals appear as Students in Grades, you may confirm they are enrolled as Participants rather than Students by going to People. If you confirm the individual is not a Participant and still have questions regarding their access to your course, please email canvashelp@uidaho.edu for assistance. No. The University of Idaho requires an active UofI computer account and DUO to access the Canvas server. Consider using the free version of Canvas if you wish to have non-UofI individuals to participate in a Canvas course. CommunicationCommunication from Canvas Notification settings can make a big difference to instructor satisfaction. Notifications are triggered by different activities in course(s) so carefully choose a notification frequency for each type: immediately, daily digest, weekly digest, not at all. Canvas notification settings for an individual are set in Account > Notifications. What you should know about Canvas notifications
No. Also be aware that notifications emailed to students may end up in spam or trash folders. No. Unfortunately, the course must be Published for an instructor to send email to students through the Announcement Tool or the Canvas Inbox. VANDAL WEB: How to View Your Class Roster and Email All Students in a Course. Announcement Tool We recommend using the Canvas Announcement tool for periodic correspondence with students in a class. The nice thing about the Announcement tool is that not only does it email all students in a Canvas course, but also posts an archive of these announcements in the course for students to access. Thus providing a guaranteed location for students to see the announcements should they have problems receiving the email from Canvas going to spam, undelivered, etc. Please be aware that students have full control of what messages they receive from Canvas and how they receive them. Also know that any messages emailed to students through Canvas may end up in spam or trash folders. Announcements show by default at the top of a course homepage. However, when content is copied over from another course, its course settings come over as well--overriding existing default settings. To setup announcements display at the top of a course homepage:
The announcement Title shown in a black, bold font, is the link to the announcement. Simply click on the Title and you will be taken to the full announcement. Canvas InBox The Inbox is a feature of Canvas (called Conversations) which functions as a simple, internal Canvas communication system. It provides you with the ability to have text conversations-—like mobile phone chat-—with one or more students in your course. (Note: Canvas Conversations do not support images or hyperlinks--just text.) All messages from students sent to the Canvas Help link titled "Ask your Instructor a Question", go directly to the Canvas Inbox. Students--just like you--also have access to the Inbox through the Canvas global menu. Thus, you are encouraged to check the Inbox regularly, so you do not miss these communications from your students. Depending on how each individual's Canvas notification options are set, copies of these Conversations may also be emailed to your preferred U of I email address. Canvas notification settings for an individual are found in Account > Notifications (look for the section labeled Conversations). Canvas Conversations (see Inbox in the Canvas global menu) are contained within Canvas and are not true emails. However, depending on how notification options are set, copies of these Conversations may also be emailed to the user's preferred U of I email address. Additionally, the sender's notifications must be turned on appropriately for these messages to be sent out immediately. Canvas notification settings are found in Account > Notifications (look for the section labeled Conversations). Note: Any message sent from Canvas to an external email address may be Replied To without issue. The Canvas Inbox does not have a dedicated Sent box. Instead, it uses a Sent filter to show Conversations started by you. Replies between you and the other person show as a standard back-and-forth thread like email. We do not recommend that you rely solely on the Canvas Sent filter for archival records of your Canvas communications. Alternative Methods To download a CSV file of the student data shown on the Students Analytics webpage (including email addresses):
Yes, you and your students can Use the Canvas Editor to Record Video and Audio directly from a Webcam. Try to keep these short (500 MB Limit). Canvas tools supporting this feature are Announcements, Assignments, Discussions, Pages, and Quizzes. Note: Safari does not support this feature. Use Chrome, Edge, or Firefox. Go to Settings > Navigation in your Canvas course. Drag the Chat menu item up into the "available" navigation block. Press Save. After that, you and your students simply need to click on Chat from the left menu.
|
||||||||||||||||

Fine Tuning
Click on the Student View button at the top right corner of your course. To return to the Instructor View, click on the Leave Student View button at the bottom right corner of your course.
Each Canvas course has a separate Test Student account. You can reset Test Student data at any time; however, Test Student activity that involves interactions with other students cannot be removed, such as discussion replies. Submissions and scores for the Test Student do not affect course analytics.
Note: An Instructor CANNOT open Student View in two Canvas courses simultaneously while using two different browser windows. The Student View will work in the first course but will give "Access Denied" in the second course.
Yes. Review Making Your Course Content Accessible to learn about the tools provided in Canvas to help you make course content more accessible. Canvas accessibility tools include:
- The Microsoft Immersive Reader enhances reading experience by improving accessibility and boosting reading comprehension.
- Ally creates alternative versions of course content automatically which students can download. Send students to Alternative Course Content Formats for more information.
- Ally scans course content for accessibility issues and assists in making your course material more accessible. Included as part of Ally is a new feature which works directly within the Canvas Rich Content Editor to help you fix accessibility issues in Canvas Pages.
- The Accessibility Checker in the Canvas Rich Content Editor is an accessibility tool used to detect and fix common accessibility errors within the editor.
Yes, Canvas resizes images according to the screen size being used and thus, our recommended image size is 1100x275px for a Page banner. We also recommend that you display these images at 100%.
CETL pays an annual license fee for images from istockphoto.com and can obtain images for UI Instructors. Follow the steps below to request banner images from CETL for use in Canvas course(s):
- Go to istockphoto.com to search for Essentials images. (We don't have a license for Signature images.)
- Take note of the istockphoto number for each image you wish to use.
- Email canvashelp@uidaho.edu and ask us to create 1100x275px banners for your course. Be sure to include the list of istockphoto numbers you desire.
- How do I add a rubric in a course?
- How do I add a rubric to an assignment?
- How do I add a rubric to a graded discussion?
- How do I add a rubric to a quiz?
Warning: Rubrics cannot be edited once they have been added to more than one assignment. And when you delete a rubric, Canvas will remove the rubric from all associated assignments in the course and remove any existing scores and assessments given using the rubric.
Mastery Paths allows you to customize learning experiences for students based on each individual's performance. You can enable Mastery Paths to automatically assign coursework based on the score achieved for a previous assignment. With Mastery Paths, assignments are differentiated to individual students automatically and no additional work is required aside from grading student assignments as usual.
Troubleshooting
The Module must be Published for any of the content (including assignments and quizzes) contained in the Module to function for students. To publish the Module, click on the circle with slash at the top of the Module (right side) so that it turns green. Note: You may still choose not to publish individual items within the Module.
Go to the Navigation tab in Settings, disable the Modules page, and click Save. Then manually drag the Modules page back to the top group of pages (instead of selecting Enable) and press Save again. This overrides any existing issues and makes the Modules page visible in Student View.
Additional Notes
- The "eye with slash" icon indicates that it is hidden from students. Go to Settings > Navigation and drag it up to the top area to make it visible to students. Then press Save.
- Details on Managing Course Navigation Links including the difference between hidden and disabled.
You can always restore items in a Canvas course by typing /undelete after the course ID in the URL (i.e. course address). For example: https://canvas.uidaho.edu/courses/######/undelete, where ###### is the unique number for your course in Canvas.
This /undelete view displays a list of recently deleted items and allows you to restore them as needed.
Options
- Copy all Course Content from a past course into your current course. All Rubrics automatically import with the rest of the Course Content.
- Remember that the Canvas Course Copy "pulls from" -- thus perform the copy from the (empty) course.
- You must have Teacher access for both courses to perform a course copy.
- Importing a course more than once may have unintended consequences. If you import content into a new course, edit the content in the new course, and later import the previous content again, the imported content will override the existing content.
- Import an Assignment from another Canvas course. This will automatically import its attached Rubric.
- Import a Discussion with an attached Rubric from another Canvas course. This will automatically import its attached Rubric.
- Import a Quiz with an attached Rubric from another Canvas course. This will automatically import its attached Rubric.
- Use the "Find a Rubric" feature to locate the Rubic you want to use from a past course when Adding a Rubric to an existing Assessment. Note: The "Find a Rubric" feature is not available through the Rubric "left menu item". It is only available when you ask to add a rubric to an Existing Assessment.
Assignments
View and grade student submissions via the Canvas SpeedGrader. There are several ways to go to SpeedGrader:
- To the right of the Column Title in the gradebook, click on the three vertical dots and select SpeedGrader from the options.
- Click on one of the Gradebook Cells showing the score for an assignment. A small icon with a right arrow in it shows to the right. Click that icon to load SpeedGrader.
How do I add Annotated Comments on student submissions using DocViewer in SpeedGrader? Note: If you use the pen to mark up an assignment, be sure click on the Check (✓) icon to save each drawn annotation.
Turnitin Originality is available in Canvas as a "Similarity Detection Tool" for student-submitted work through the Assignments tool. You MUST enable Turnitin for a Canvas assignment BEFORE students submit their work. This allows your students to agree to terms regarding the scanning their work.
Use SpeedGrader to view Turnitin Originality reports for student submissions. For more info, visit Instructor Help for using Turnitin with Canvas.
Can I run a paper through Turnitin Originality without using Canvas?
No, CETL only supports Turnitin Originality which must be used through Canvas Assignments.
Turnitin, LLC offers a different product for checking manuscripts and dissertations named iThenticate. Please contact Stephanie Thomas (slthomas@uidaho.edu) at the UofI Graduate School for help in accessing iThenticate.
In April 2023, Turnitin added AI writing detection capabilities to its similarity report. This feature shows the possible percentage of a document that may have been generated by AI tools (e.g., ChatGPT). To view the AI report, click on the AI indicator score (located on the right side of the similarity report).
Please proceed with caution when using this score as the state of AI-generated text is developing rapidly, making it difficult to be confident in the accuracy of the AI indicator score. It is possible to get false positives for overly redundant text and other types of writing the AI-detector has not been designed to review. Submissions must have at least 300 words of prose text in long-form writing to be given an AI score. Shorter submissions are not scored. We advise you to only use this information to start further discussions with your students.
- FAQs for Turnitin's AI writing detection capabilities
- Turnitin's AI writing detection - Feature guidance
- Understanding false positives within Turnitin's AI writing detection capabilities
- How to prepare for and discuss the possibility of false positives within AI writing detection tools
- AI conversations: Handling false positives within AI writing detection tools (written for students)
- Academic integrity in the age of AI
Don't make this common mistake! Always setup Extra Credit to be worth zero points. Extra Credit setup with a point value greater than zero actually counts against a student's grade rather than helping to increase their score.
- Start the import from your "destination" course. The "destination" course is where the rubric is going to be copied into. The "source" course is where your rubric currently exists.
- From your "destination" course, click Settings at the bottom of the left menu.
- Press the Import Content button on the right side.
- Select Content Type: Copy of Canvas Course.
- Enter the name of the "source" course which contains the rubric.
- Choose the option: Select Specific Content.
- Press the Import button.
- Press Select Content. This opens a dialog box.
- Click the arrow to the left of the Rubrics section.
- Check the box to the left of the desired Rubric's Name.
- Press Select Content at the bottom to start the copy.
Create a "no submission" assignment for this type of need. Enter grades for this type of assignment by going directly to the gradebook column to enter the scores manually.
Troubleshooting
Canvas does not give you the ability to give an extra attempt for an assignment to just one student. Instead, edit the assignment settings to allow more attempts for everyone in the class. Or have the student email you the file with the additional attempt and then manually enter the resulting score into the Gradebook.
Canvas does not give you the ability to delete a student submission or ignore it. Instead, edit the assignment settings to allow more attempts for everyone in the class. Or have the student email you the correct file and then manually enter the resulting score into the Gradebook.
You can assign different due dates and/or availability dates for the same assignment. This allows you to give different due dates for each section of a class or provide extensions for individual students without having to create a new assignment. (This is also available for Quizzes.)
- Edit the assignment
- Look for an Assign to: card at the bottom of the page. This card will be assigned to Everyone. (don't change this)
- Below the available dates, look for a + Add button and select it to add an additional Assign to: card.
- In the new card's Assign to field, select the student or section's name from the dropdown list. Note: After selecting the name of the student or section, the first card's Assign to field will change from Everyone to Everyone Else.
- Enter from and until available dates.
- Enter a due date.
- Click Save or Save & Publish.
Instructions for how to submit an assignment on behalf of a student.
Review the Canvas Course Access Report for the Individual User
Note: View Analytics for an Individual Student (in New Analytics) (U of I uses New Analytics)
Open a browser window in Incognito and run Canvas there. If this works, there is probably a browser extension causing a conflict with SpeedGrader. The solution is to load Canvas in a different browser or identify the problematic extension and disable it.
Quizzes
Quizzes (Create)
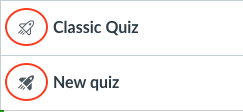 Classic Quizzes
Classic Quizzes is the default option at the UofI.
Help for Canvas Classic Quizzes
New Quizzes
Although New Quizzes is not on by default, this tool is installed and ready to use at the UofI. Learn more about New Quizzes.
If you would like to experiment with New Quizzes, you must enable it in your course by selecting Settings > Feature Options > New Quizzes. Once this setting is changed in a course, you will be given the option to choose either the new or classic quiz style each time a quiz is created.
Help for New QuizzesNote: New Quizzes are not currently supported by Rosalyn.
- Build a New Quiz. This is for review purposes only. Do not randomize its questions or deliver questions one at a time.
- Locate and select the targetted Question Bank
- Scroll down to the bottom and click More Questions (if needed).
- Scroll up to the top and press Select All
- Scroll down to the bottom and press Add Questions
- Scroll to the top and check the box to Show Question Details
- Run the printer for your browser and print/save to Adobe PDF
- Cancel out of the unnamed quiz without saving it
- Go to Quizzes from the left menu and delete the Unnamed Quiz located there
Check the box located in the Quiz Details section to Shuffle Answers for all questions in a quiz.
In Canvas, you are not able to decide PER QUESTION to shuffle answers or not. Instead, the choice is to SHUFFLE THE ANSWERS FOR ALL QUESTIONS included in a quiz ---OR-- SHUFFLE NONE OF THE ANSWERS FOR ANY QUESTION included in a quiz.
Shuffling answers is an important part of designing quizzes to be unique from one attempt to the next. Our recommendation is to modify any questions that require the answers to display in a specific order. For example, change "None of the above" to "None of these answers is correct".
Unless the Shuffle Answers box in Quiz Details section is checked, answers display in the order they are added to a question when it is created. So, if you choose not to shuffle answers for a Canvas quiz, be sure to manually shuffle the answers yourself when creating quiz questions.
San Diego State University offers the Canvas Quiz Converter which is excellent.
Display Order for Quizzes is based on due date, then alphabetical. By default, Quizzes assigned to a specific individual or group rather than "everyone" appear at the bottom of the Quizzes page.
For the Assignments page, you may drag and drop graded items to reorder them (click and drag the dotted icon to the left of each assignment). Manually reordering Assignments also changes their order in the Gradebook.
Don't make this common mistake! Always setup Extra Credit to be worth zero points. Extra Credit setup with a point value greater than zero actually counts against a student's grade rather than helping to increase their score.
Do not create a Canvas quiz to record scores for exams taken external to Canvas! The total value for a quiz is calculated directly from the points assigned to each quiz question, thus the quiz tool cannot be used without adding questions to it. Instead, create a "no submission" assignment for this type of need. Enter grades for this type of assignment by going directly to the gradebook column to enter the scores manually.
Quizzes (Deploy)
STEP-BY-STEP: How to Give Students Extra Time to Take a Canvas Quiz (for "Classic" Quizzes)
Giving a student extra time on a quiz (for CDAR accommodations) is accomplished through Moderate This Quiz settings (located on the right-hand side of the Edit Quiz screen). Extra time can be given for any Canvas quiz including those with no due dates. However, a quiz must be published before it can be moderated.
You can assign different due dates and/or availability dates to the same quiz. This allows you to give different due dates for each section of a class or provide extensions for individual students without having to create a new quiz. (This is also available for Assignments.)
Allowing a student to take a quiz at a different time than the rest of the class is accomplished through the Quiz Settings.
- Edit the quiz
- Look for an Assign to: card at the bottom of the page. This card will be assigned to Everyone. (don't change this)
- Below the available dates, look for a + Add button and select it to add an additional Assign to: card.
- In the new card's Assign to field, select the student or section's name from the dropdown list. Note: After selecting the name of the student or section, the first card's Assign to field will change from Everyone to Everyone Else.
- Enter from and until available dates.
- Enter a due date.
- Click Save or Save & Publish.
- Recommended setting for printing via your browser: Printer: Adobe PDF, Layout: Portrait, Advanced Settings: Turn off Headers/Footers and Background Graphics
- If your quiz is setup to Show one question at a time, change this setting temporarily to Show all questions to print. If the quiz is already deployed, duplicate the quiz, and change the setting in the duplicate version to Show all questions before printing.
Note: Printed quizzes often split answer options between pages and leave little room for essay answers.
Review the Canvas Course Access Report for the Individual User
Note: View Analytics for an Individual Student (in New Analytics) (U of I uses New Analytics)
- Click on the Canvas Quiz
- Press the Edit button
- Scroll down to see the following settings:
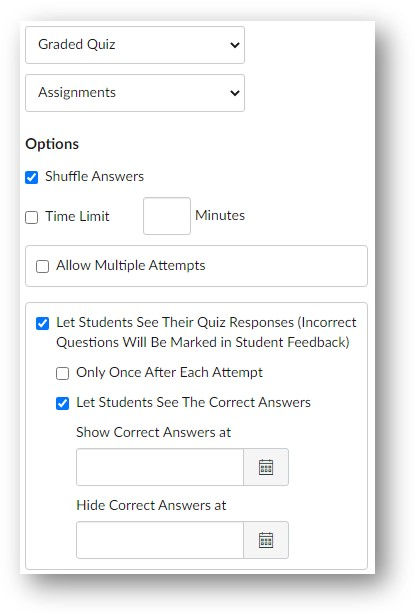
These settings allow you to control what results are shown to students:
- What results students see (responses, correct answers, feedback)
- When results are displayed to students (display after date, show until date)
- The number of times students can view the results
After making appropriate changes, press Save.
No.
Other Assessment/Survey Tools
Instructions for viewing the course access report for an individual user. This help covers the following:
- Viewing the course access report for an individual user in the People section of your course. The course access report shows a summary of user participation in your course and complements the Total Activity column in the People page.
- Viewing the full specific report for a student by viewing student analytics.
- Viewing your specific interactions with a student in the student interactions report.
Yes. You and your students can Use the Canvas Editor to Record Video and Audio. Try to keep these short (500 MB Limit). Canvas tools supporting this feature are Announcements, Assignments, Discussions, Pages, and Quizzes. Note: Safari does not support this feature so use Chrome or Firefox instead.
Specific Tools
The Canvas Attendance tool, "Roll Call", is enabled at the UI, but is not turned on by default. To turn it on, go to Settings | Navigation and drag the Attendance Tool item up into the displayed items area. Save the navigation settings. Help for Attendance (Roll Call)
The Canvas Attendance tool, "Online Attendance", is located under New Analytics. For this tool, you can specify the criteria required of students in order for them to be marked as attending for a given day. Help for Attendance (Online Attendance)
No. Canvas Discussions can be used as a Blog tool as they allow students to see each other's posts and make comments on them. They can also be graded if required.
Canvas does not have a dedicated tool for journals, but you can Use the Discussion tool to deliver a Journal Assignment. A Journal Assignment requires students to record periodic thoughts and reflections to be read/graded by the instructor but cannot be viewed by other students.
Groups in Canvas are used as a collaborative tool to allow a sub-set of students to communicate within a Discussion or work together on group projects and Assignments. As an instructor, you can view what is happening in groups by viewing each student group from within People. You can view student activity within each group and view group-created content. You can also access these Groups to create group collaborations and add other group-specific content if necessary.
- How do I create Groups in Canvas?
- How do I assign a Discussion or an Assignment to a Group?
- How do I view content and student activity within a Group as an instructor?
- Help for Students using Canvas Groups
- Working with Groups in Canvas
Note: Student Group membership in Canvas is limited to Students and Participants.
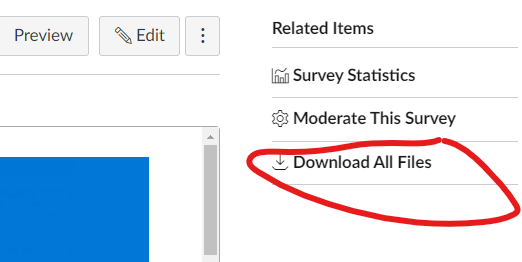
You cannot use SpeedGrader to view the results of a Survey. Instead, use the options shown below.
Option 1: Go to your survey and select Show Student Survey Results
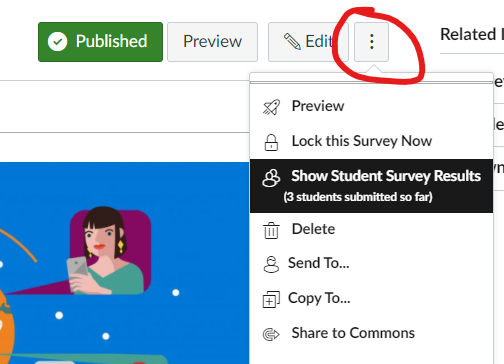
Option 2: Go to your survey and select Download All Files
Canvas LMS does not include a Wiki tool specifically, however each page can be edited by multiple authors if designated by the instructor. Create a Page and then change its settings to allow anyone to edit it. Note that the Pages tool cannot track participation and contribution statistics.
Gradebook
The Basics
If students are submitting something in hard copy form, or if it's something like attendance, set up an Assignment with a submission type of "no submission". Enter grades for this type of assignment by going directly to the gradebook column to enter the grades manually.
Create assignment columns for "non-submission" assessments.
Note: Quizzes cannot be assigned a point value. The total value for quizzes is calculated directly from the points for each quiz question. This is why an assignment--rather than a quiz--must be used to create a "no submission" column.
Don't make this common mistake! Always setup Extra Credit to be worth zero points. Extra Credit setup with a point value greater than zero counts against a student's grade rather than helping to increase their score.
Curving Grades
Several methods can be used to curve grades. Each method achieves a different goal and produces different results. Curving Grades: Four methods explained.
- Use a Mathematical Curving Approach
- Use a Flat-Scale Formula for Curving Grades
- Use a Bottom Limit to Define an F
- Use a Bell Curve (Canvas uses this method)
Grade curving options for Canvas
Reduce Points Method
Once a value is determined for curving a graded item, reduce the graded item's point value by that number. This effectively has the same result as adding points to each student's score--except that it can be done with ONE simple change rather than having to add points to EVERY student score.
Canvas Built-in Method
Go to the Gradebook to curve grades in Canvas. Canvas curves grades by asking for an average score and then adjusting the scores along a Bell Curve around that score. The resulting grades are impacted differently based on where they fall in the distribution of scores. Perfect scores are not affected by this method. WARNING: Grade Curving via Canvas cannot be undone!
External Calculation Method
If neither of the two grade curving options listed works for you, consider exporting the Canvas gradebook, curving the student grades as desired with Microsoft Excel, and then re-importing the gradebook back into Canvas.
Fine Tuning
There are two options you can use to Auto-fill Missing Grades:
- How do I apply a Missing Submission Policy in the Gradebook?
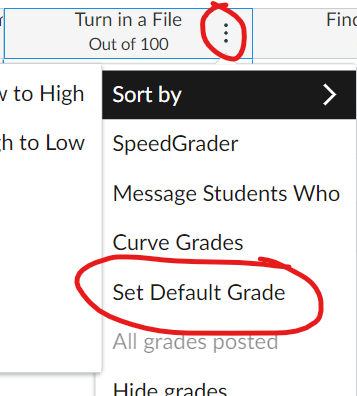
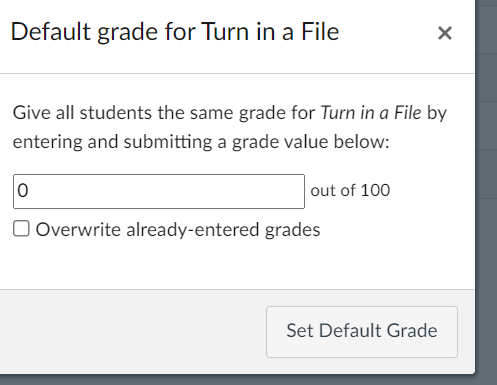
- To put in zeros for just one grade column for anyone you have not given a grade to yet, click on the three dots to the right of the grade column title and then select Set Default Grade. (DO NOT check the box to overwrite the grades you have given already.)
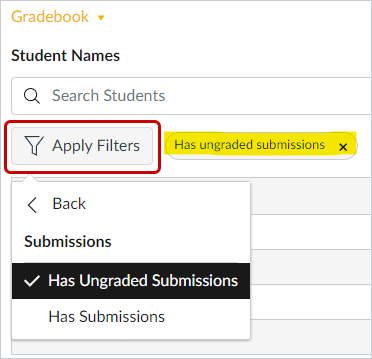
Yes. View only the Grade Columns containing Ungraded Submissions by going to the gradebook and selecting Apply Filters > Submissions > Has Ungraded Submissions. When you are ready to view all columns again, click on the Has ungraded submissions button to cancel the filter (highlighted in yellow below).
Enhanced Gradebook Filters (a new feature in Canvas) can be used to control which grade columns and rows display. For more information, view How do I use Enhanced Gradebook Filters?
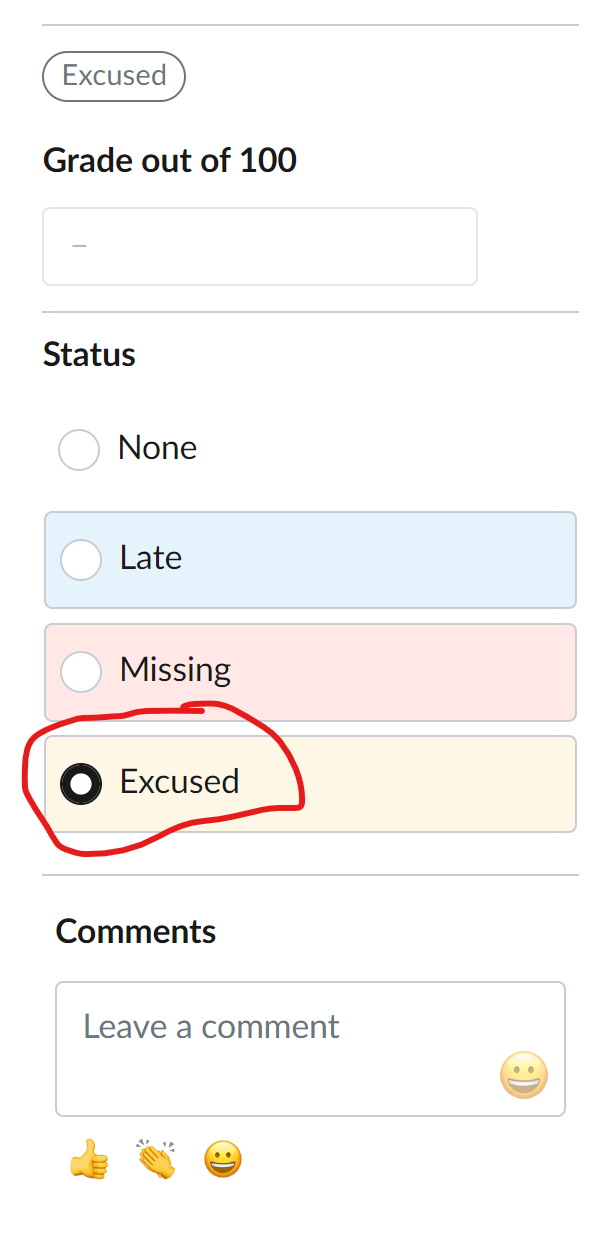
Yes. In the gradebook, click on the assignment for a student who elected not to take it and mark it as Excused.
Yes. For the Canvas Gradebook, you can select a default automatic or manual grade posting policy for all course assessments or for a specific course assignment. Posting policies determine grade visibility for students.
Yes.
- Go to Settings in your course
- Uncheck the box labeled: Enable course grading scheme
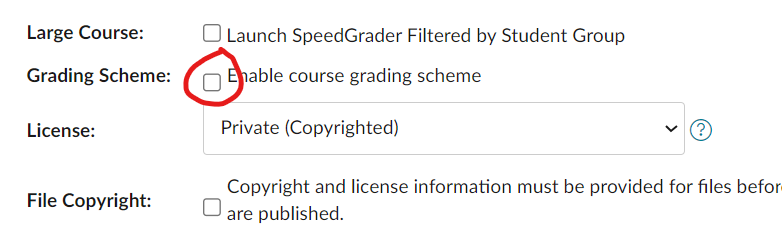
- Press Update Course Details at the bottom to save your changes
- Go to Course Settings
- Scroll down to check the box next to Enable Grading Scheme (near the bottom)
- Click on the link underneath it titled: view grading scheme
- Click on the link: Select Another Scheme
- Click on Letter for 90-100%(A), 80-89%(B), 70-79%(C), 60-69%(D), below 60%(F)
- Press Use this Grading Standard
- Press Done
- Press Update Course Details
Analytics and Troubleshooting
View Analytics for an Individual Student (in New Analytics)
Note: (UofI uses New Analytics)
Email canvashelp@uidaho.edu for assistance.
Are you running the Safari browser? If so, on 02-16-2023 an update made it impossible to view the Canvas Gradebook using any Safari version older than v16.3. Thus, update your browser to the newest version or use a different browser for Canvas.
Note: Safari updates only come via the Mac update system. A large jump in versions may require you to update to the next OS version. And it is possible that the hardware you have will not allow further OS updates due to lack of processor power, etc. If so, change to a different browser.
3rd-Party Apps
See Add-On Tools Available through UI Canvas for a full list.
Steps for linking to a 3rd-Party Product from the left menu of your course:
- In your Canvas course, click Settings (bottom left)
- Click Navigation (across top)
- Drag and drop the desired 3rd-Party Product from the bottom list to the top list
- Press Save
Note: If you do not see the 3rd-Party Product listed, this feature is not offered.
(These instructions use the example of embedding a YouTube video into a Canvas Page.)
In YouTube
- Locate the video
- Press Share on the lower right
- Select Embed
- Press Copy (this copies the embed code into your clipboard)
In Canvas
- Click on the + symbol next to the desired module
- Select Page
- Choose [Create Page]
- Enter a Title for the Page
- Press Add Item
- Click on the Page Title to open it (The page will be located at bottom of the module.)
- Click Edit from the upper right side of the screen
- Select Insert > Embed
- Paste the Embed Code from your clipboard into the text box
- Press Submit
- Press Save
All requests for new tools to be integrated with Canvas must go through both CETL testing and FERPA/Security reviews conducted by OIT. This process can take up to three months, so it is best to make requests in the semester prior to when the tool is needed. We ask that those who make requests take an active role working with CETL and the software vendor to help test new tools as needed. Please fill out the Request for a Third-Party Add-On Tool Form to make a request for the subsequent semester.
Specific Apps
Go to Settings > Navigation in your Canvas course. Drag the PointSolutions Registration menu item up into the "available" navigation block. Press Save. Click on PointSolutions Registration from the left menu to start the connection process. Note: The course must be Published before connecting.
Go to PointSolutions Registration (echo360) for more help.
Questions? Contact CETL's Instructional Designers for One-On-One Assistance.
How to use EdPuzzle with Canvas. Instructors and students should select Microsoft when logging into Edpuzzle using their UofI Account. Note: Student View cannot be used to test this tool. EdPuzzle actions requiring a Teacher role may not work for the Canvas TA role (e.g., EdPuzzle integration, assignment setup, and access to student submissions).
Questions? Contact CETL's Instructional Designers for One-On-One Assistance.
Guide to Using Flip in Your Canvas Course
How to use Flip with Canvas. Instructors and students should select Continue with Microsoft when logging into Flip using their UofI Account. Note: Student View cannot be used to test this tool.
Questions? Contact CETL's Instructional Designers for One-On-One Assistance.
Instructors and students should select Log in with Microsoft when logging into Padlet using their UofI Account. Note: Student View cannot be used to test this tool.
Steps to add a link to your Padlet in Modules
- In Modules, click on the Plus icon (+)
- From the pulldown menu, select External URL
- Paste in the Link to your Padlet (https://padlet.com/ . . .)
- Enter a Page Name (title) for the link
- Check the box to Load in a new tab
CETL testing revealed Microsoft authentication to be unstable when Padlet was embedded in Canvas. Opening in a new tab solves this problem. - Press the Add Item button
The free version of Padlet can be used in Canvas but will not be able to integrate Padlet's assignments or scores into the Canvas gradebook. UofI does not have the site license required for full integration.
Rather than upload files directly into the Canvas files area, select Panopto Video to upload your videos into--which offers higher quality and automatic closed captioning. Panopto's viewer provides control of the video playback's volume, speed, and quality. (Note: Videos stored in Panopto do not count against the Canvas course quota.)
![]() Follow the help links below to learn how to use Panopto to host and record video for delivery in your Canvas course.
Follow the help links below to learn how to use Panopto to host and record video for delivery in your Canvas course.
- Instructors: Using Panopto for Video
- Students: Using Panopto for Video
- Go to Settings > Navigation and drag Perusall up to your course's "available" block. Press Save. This will place a link to Perusall in your course's left navigation menu.
- Perusall Instructor Online Help
- Submit a Request to Perusall for Support
The tool in Canvas that aids in this is called Portfolium or Folio. You and your students may access this by clicking on the Account menu item on the left and then selecting Folio. Once students make a portfolio, you may create a URL assignment in Canvas to ask students to submit the URL to their portfolio for grading.
The SCORM LTI has been enabled for canvas.uidaho.edu. Go to Settings within the course and select Navigation. Drag the SCORM menu item up into the visible area. Press Save.
- How do I link to a YouTube video in the Rich Content Editor as an instructor?
- How do I link to a YouTube video in a discussion reply as an instructor?
- Links to Videos not working? Edit and check the box to open in a new window. This may fix the problem.
Troubleshoot
If something in Canvas is not behaving correctly, try fixing the issue by taking the following actions, one at a time, until the problem resolves:
- Update your browser (Chrome, Edge, Firefox, Safari) to the newest version. If you are unable to update to the newest version because your hardware is too old, install/use an alterative browser. (On 02-16-2023, for example, an update made it impossible to view the Canvas Gradebook using any Safari version older than v16.3.)
- Clear your browser cache
- Completely close all browser windows
- Try with a different browser
- Reboot your computer
- Reset the cookies in your browser
- Try connecting from a different computer
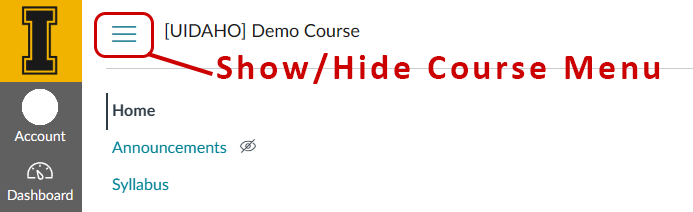
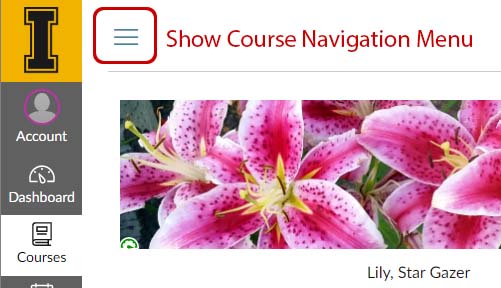
Click on the 3 horizontal lines on the top left corner of your window to show the Course Navigation Menu.
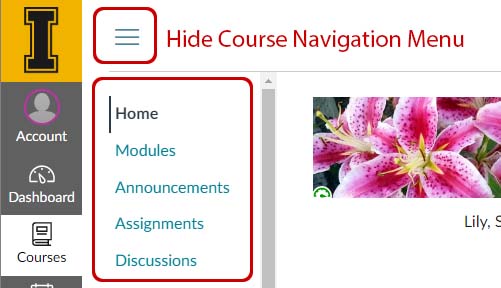
This is a toggle, so click on the 3 horizontal lines to hide the Course Navigation Menu.
See Browser and Computer Requirements for Canvas. This page checks to make sure your browser is up to date and provides updated details on any issues with Canvas (per browser platform). TIP: Turn off extensions and 3rd-party tools in a browser whenever troubleshooting in Canvas to eliminate these as issues.
Video Delivery
Zoom Help
How to deliver Zoom Recordings through Canvas stored in Panopto, OneDrive, or YouTube.
Note: All Zoom Recordings are automatically moved to your OneDrive location when you record to the Cloud via Zoom.
Add Link to Zoom Room
Click on the Plus icon located on the right side of the Module heading in Canvas. Select External URL from the pull-down. Paste in the URL for the Zoom Session. Give it a Page Name (e.g., Course Zoom Session). Check the box to Load in a new tab. Press Add Item.
Add Zoom Tool
Click on the Plus icon on the right side of the module heading. Select External Tool from the pull-down. Click on Zoom which appears at the bottom of the list. Press Add Item.
Individuals with Zoom authentication problems should log into https://zoom.uidaho.edu first. This forces them to sign in via their UI Zoom account -- a requirement for UI authentication. Alternatively, they can click the SSO button displayed on the Zoom login screen to force authentication through UIDAHO.
By default, Zoom sessions at the UI are setup to allow "Only Authenticated Users" access to a Zoom session. Individuals may have more than one Zoom account (e.g., one for each school they are associated with). As of 2022, UI REQUIRES the use of a UI Zoom account for all "Only Authenticated Users" Zoom sessions.
The Collaboration & Classroom Technology Services (CCTS) team, which is part of the Office of Information Technology (OIT) supports the Zoom platform, and they have the most accurate information for all questions related to Zoom at the UI. Please visit Collaboration & Classroom Technology Services (CCTS) or email ccts@uidaho.edu for assistance.
The Collaboration & Classroom Technology Services (CCTS) team, which is part of the Office of Information Technology (OIT) supports the Zoom platform, and they have the most accurate information for all questions related to Zoom at the UI. Please visit Collaboration & Classroom Technology Services (CCTS) or email ccts@uidaho.edu for assistance.
- SIGN IN to Zoom at https://zoom.uidaho.edu/
- Click on Reports shown in the left menu
- Click Usage
- Edit the date range to help you locate the meeting
- Click on the number of participants (in blue) under the Participants column
- Click on the Export button to print/save the data
- Once you’re in an active Zoom meeting, click on the Share Screen option from the bottom menu. (You may need to ask the host give you permission to share your screen.)
- Choose to share your Desktop.
- If prompted, click on Open System Preferences which takes you to your Mac's Security & Privacy settings.
- Choose Screen Recording from the left pane.
- Check the box next to Zoom.
- Close the window to return to Zoom.
- Choose to share your Desktop again.
- Click Share.
Instructors should be mindful of policies
regarding FERPA. Test your knowledge by
taking the FERPA Tutorial in VandalWeb under Personal Information.
Return to Canvas Support